Showing posts with label Cupcake. Show all posts

Thursday, October 31, 2013

Happy Halloween

Happy Halloween!
Here are some cupcakes I made for a cake walk at the school fundraiser.
Hairy scary monsters
 Ghoulish Ghosts
 Pretty Pumpkins

Wednesday, August 28, 2013

Oh Cupcake!

During my somewhat unintentional summertime baking hiatus, I still had LOTS of cupcake orders.  I didn't always take pictures. (OH, the shame!)  But you get the idea.  Recently, orders have started picking up.  I guess it's back to school and back to baking!  Last week, I had 3 cupcake orders back to back.  Wed. Thurs. and Friday!
Almond Joy Cupcakes
My mouth is watering just looking at this picture!

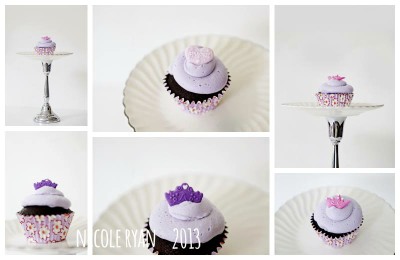
 Princess birthday cupcakes for school.
The client (and my friend) is also a photographer.  Her pictures look way better than mine! (Wonder if I could hire her to be my full time cake photog?)
 Musical cupcakes for our choir director's birthday

 "Burnin' Loves" for a squadron function
 Tie-Dye cupcakes (airbrushed) for the Radical Retro Ride children's choir kickoff.
 Some of them even had tie-dyed cake, but that was taking too long!
So, yes, the oven is still on in my kitchen.  It smells of buttercream daily and after every order I stick to the floor!  My wonder mop has been busy!

Wednesday, July 4, 2012

Key Lime Pie Cupcakes

Well, even though I'm taking a little hiatus, that doesn't mean I've stopped baking altogether.   I recently made some key lime pie cupcakes per the request of my Mother-in-law.  She sent me the recipe to try and I must say, they were perfectly refreshing for the hot dog days of summer!


Thursday, April 5, 2012

Easter Cupcakes

When my son has a party at school, I try to make some kind of cute cupcake that I think the kids will enjoy.  Well, this time I went a little crazy!  I saw these cute cupcakes in the book "What's New Cupcake" and thought I'd give them a try.  
I started out with great intentions of a step by step "how to", but I got a little distracted.  (oops)  First, I started out with plain 'ole plastic easter eggs. *You have to use the ones that don't have little holes in them.*
Wipe the insides with a little vegetable oil and coat the inside with melted chocolate. (I used candy melts)
Place the coated eggs face down on a cookie sheet and chill in the fridge for about 5 minutes.  Now for the hard part....getting them OUT of the eggs without breaking.  (This is probably where I became to frustrated preoccupied to continue with my "how to" photos.  Anyway, CAREFULLY remove the chocolate from the molds.  I found it worked best when I used my tiny paring knife from Pampered Chef to help separate the chocolate from the mold.  Granted, I made a HUGE mess and broke a ton  a couple before I got the hang of it.   
Once I got them out, I filled them with jelly beans and sealed them shut with some icing.  I covered the mess of a seam with a fondant strip and decorated with leaves and flowers.  


 Up close, you can see what a mess they are.  LOL  But from far away, they made quite the impression. 
The cupcakes were a new lemon recipe. (YUM) with raspberry filling and lemon buttercream (tinted green for the grass.)  They were very cute, but time consuming.  Much like my ValenSwines, there were just enough for the class!

Friday, March 2, 2012

Happy Birthday Dr. Suess!

I decided to honor Dr. Suess on his birthday with some baked goods.  What better way to do so than with Thing 1 and Thing 2 cupcakes!  (Ok, so Andrew's teacher asked me to do something "Dr. Suess-ish," but I had been wanting to make these little babies, so it worked out perfectly.)

I started with the cupcake cups.  I had to label them, so I painstakingly lovingly traced out some circles, printed out some Dr. Suess font, cut, and glued 2 dozen labels!  (Thank you swim class for giving me 40 uninterrupted minutes!)
 Don't worry, from a distance you couldn't see the cut/paste lines!
 Color the frosting blue, stick some blue cotton candy on top for hair and ta-da...thing 1 and thing 2 cupcakes!


 Thing 1 was vanilla.
 Thing 2: chocolate!
**Side note:  If you try this at home, be sure NOT to put the cotton candy on until you're ready to serve and eat them.  All the oil from the frosting melts the cotton candy.  You have about 15 minutes before it starts to look like liquid mush!**


Tuesday, February 28, 2012

Almond Joy Cupcakes

Sometimes you feel like a nut...sometimes you don't!  Today, I did, so I made some almond joy cupcakes.  I saw a recipe on Pinterest that I wanted to give a try.  One I really like came from "Cookies and Cups."  Go HERE to check out the recipe!
I didn't follow her recipe exactly.  I used my chocolate cake recipe and altered it a little, substituting milk with coconut milk and vanilla flavoring with almond.  This is, after all, ALMOND joy!   The coconut buttercream was divine!  Dipping them in melted milk chocolate really seals the deal and makes you feel like you're eating an almond joy!

I took a couple to Andrews school and his teacher's response: "OM-Triple G! Those are good!"  The secretary said she liked them even better than the "burnin' loves."  The rest of them went to work with Drew.  He didn't bring any home if that tells you anything.  

I only ate 1...ok fine...2!  They were dangerously delicious, so I had to get rid of them A.S.A.P!  But I will be making another batch next week!

I decided to dress these little cuties up in a wrapper. *Note to self: Must get decorative scissors from Parents' house before making decorative cups next time!*

I was really pleased with how these turned out, but I think I'll experiment with the almond joy coffee creamer for the next batch, just to see which recipe I like better!

Thursday, February 23, 2012

Lullabies and Mudpies Sale

To all my local readers, don't forget to come out to Pace this weekend for the Lullabies and Mudpies consignment sale.  Sissy's Sweets will have a vendor booth set up.  On the menu: CUPCAKES!

Here's just a couple of our stars for the sale:
The Gracie:
chocolate cake filled with sweetened condensed milk, topped with chocolate frosting, caramel drizzle, and sea salt.  
 Ooey, gooey goodness
 The Funky Monkey
Banana nut cake with peanut butter buttercream

Tuesday, February 14, 2012

Valentine Goodies

Happy Valentine's Day from Sissy's Sweets!
Today I made some cake pops and cupcakes for my son's school party.  I found this cute idea on cakepop gallery and thought I'd give it a whirl.  
Be My Valen-Swine!
Aren't they adorable!  Little valen-swine piggies are pretty cute, but super time consuming.  It took me an hour and a half to make all the fondant accents for their ears, arms, and snouts.  And that was just for 7...SEVEN...of them!  So the other 17 cake pops are just plain PINK!  
Because the cake pops took so long, my pink velvet cupcakes were not as elaborate as  had planned.  I was running out of time so they got a light dusting of pink sanding sugar and a fondant heart.    The kids requested "vanilla icing" so I made a whipped vanilla that normally goes on my red velvet cake.  

  *FYI: If you're still wondering how to make cakepops,  a "tutorial" is coming soon!

Thursday, February 9, 2012

Vanilla Beans

I recently ordered some Vanilla Beans off of ebay.  They were shipped from France and made it here in about a week.  I was excited to put them to use, so I whipped up some vanilla bean cupcakes with vanilla bean frosting.  (The recipe is the same one I shared earlier, The Ultimate Vanilla Cupcake, by the cupcake  project.  For my frosting, I wanted a whipped cream type of frosting, so I started out making whipped cream and adding vanilla bean.  However, once I made it, I thought, I'd experiment with something a little different.  The result:  EPIC FAIL!  (See, it's not all baking perfection over here!)
 So, I tossed that batch and started over.  The second go around, I just stuck with a vanilla buttercream. The vanilla bean makes a world of difference.  YUM!  So here are some plain Jane vanilla bean cupcakes.


Tuesday, January 24, 2012

Pineapple Upside-down Cupcakes

My 5 year old went to the grocery store with me yesterday and insisted that we get a pineapple.  He does this frequently, as we LOVED pineapple in Hawaii.  Due to the fact that the pineapple was staring at me from the counter, I was hungry, and I was going through withdrawals from not having baked anything in over a week, I decided to make some pineapple upside-down cupcakes.  (recipe to follow) A couple of years back my MIL gave me the cutest "cakelet" pan, especially made for pineapple upside-down cakelets. I was able to put it to good use as well as make 6 regular cupcakes. 
In the bottom of the pan, sprinkle some brown sugar, drizzle melted butter over it, and place a pineapple slice on top. 
For the cupcakes, I put pineapple chunks, since the slice wouldn't fit.
 
Next, pour the batter over the pineapple, sugar, and butter.
 Bake for 20-22 min
 Don't they look yummy?
 Next I whipped up some pineapple buttercream and topped them with a pineapple chunk and toasted coconut.

 Yes, they tasted as fabulous as they look!
HT-18 will be enjoying these little babies tomorrow.  (Drew is taking them to work)


CUPCAKES:
1/2 cup butter, softened + 1/4 cup melted
1 1/2 cup all purp. flour
1 1/2 cups sugar
2 eggs
1/2 t pure vanilla extract
1 t baking powder
1/2 t salt
3/4 cup buttermilk 
3/4 cup brown sugar
pineapple slices (reserve juice for buttercream)


In mixer: Beat butter; add sugar until light and fluffy.  Add eggs one at a time; add vanilla
In separate bowl: combine four, baking powder, salt
Add flour mixture to butter mixture, alternating with buttermilk.  (Start with flour and end with flour)


In the bottom of the greased pan:  sprinkle some brown sugar, enough to coat bottom and drizzle melted butter.  Place pineapple slice over brown sugar and butter.  Pour batter on top.  
Bake at 350 degrees for 18-22 min; until toothpick comes out clean.  


PINEAPPLE BUTTERCREAM:
1/2 cup butter, softened
2 T pineapple juice (I used 4)
3 1/2 cups powdered sugar

Wednesday, January 11, 2012

Peanut Butter Banana Cupcakes

Tonight I got hungry.  I needed something sweet.  So after dinner, I started rummaging the kitchen to see what I had in there.  In the fridge I had some leftover peanut butter buttercream.  On the counter sat a near rotten very ripe banana.  That made the perfect combination to make a peanut butter banana cupcake.  
I have the most perfect recipe for banana cake E.V.E.R.  I dare you to try and find one better.  (Seriously, please try and report back if you happen to find one better because I'd love to have it!) This recipe comes from the Mount Calvary Baptist Church cookbook courtesy of Ms. Diane Pickers.  This is my favorite cookbook, not because of all the delicious recipes it contains, but because of the people who contributed to it.  This is the church where I grew up, so each time I make one of these recipes, I get to think about the person who submitted it and it always brings back such great memories.  For instance, Ms Diane was always a youth chaperone (and cook) whenever the youth group took a trip.  She would always wake us up in the mornings with her famous "Uppy Puppy" routine.  (You had to be there!)
Anyway, back to the cupcake...
Ingredients:
1/2 c. butter
1 1/2 c sugar
2 eggs
1 c or 2-3 mashed bananas (The riper the better.  If it's covered in spots, turning brown, and looks like it's on the verge of throwing away...it's PERFECT!)
1 1/2 c AP flour
1 tsp baking soda
1/4 c buttermilk (I think the buttermilk makes this recipe!)
1 tsp. vanilla
1/2 c. chopped pecans (optional, but I ALWAYS add them!)


Cream together butter, sugar, eggs, and bananas.  Add remaining ingredients. (See, this is another reason I like this recipe...it's simple!)  Bake in a greased/floured tube pan at 350 degrees for 40-45 min. 
For cupcakes: 22 min.


And now for the best part: the browned butter glaze!
2 T butter
1/2 tsp vaniila
2 T evaporated milk
1 c powdered sugar


Over low heat, brown butter until light brown (it will continue to brown once removed from heat).  Add remaining ingredients and pour over warm cake.   *If it's too thick, add more evaporated milk.
{For the cupcakes,  I put this filling in the center and then topped with peanut butter buttercream.}


For the peanut butter buttercream, I just made my regular buttercream and added 1/2 c. creamy peanut butter.  Delish!


I hope you all try this one and let me know how you like it!

Thursday, January 5, 2012

Cupcake Order

Today I had a cupcake order for a lady at my church.  She wanted some of my "hot mama" cupcakes as well as some vanilla cupcakes with strawberry buttercream.  Now I made the mistake of not taking any pictures of them, but I do have a shot of a hot mama mini.  What's a hot mama, you say?  It's a chocolate cupcake with cayenne pepper in it, topped with cinnamon buttercream.  Try it...you'll LOVE 'EM!
Now, I've found a chocolate recipe that I absolutely believe is the best chocolate cake I've ever tasted, but I haven't quite found a vanilla recipe that I'm crazy about...until today.  I found this recipe on Cupcake Project and I think it's a keeper.


Write this down and go bake it!


Yield: 16 cupcakes 
  • 1 cup (225 grams) granulated sugar
  • 1 vanilla bean
  • 1 3/4 cups (175 grams) cake flour, not self-rising
  • 1 1/2 teaspoons baking powder
  • 1/2 teaspoon baking soda
  • 1/2 teaspoon salt
  • 1/4 cup (57 grams) unsalted butter, room temperature
  • 2 large eggs, room temperature
  • 1/3 cup (75 grams) full-fat sour cream
  • 1/4 cup canola oil or vegetable oil (60 ml)
  • 1 tablespoon pure (not imitation) vanilla extract
  • 2/3 cup (160 ml) whole milk
  1. Preheat oven to 350 F (175 C).
  2. In a small bowl, combine sugar and seeds from the vanilla bean. (For those of you who are new to using vanilla beans, check out this video to learn how to get the seeds out of the bean.)
  3. Using the back of a spoon, move around the bowl and apply pressure to break up any clumps of seeds and to better infuse the vanilla flavor into the sugar. Set aside.
  4. In a medium-sized mixing bowl or bowl of a stand mixer, mix together cake flour, baking powder, baking soda, and salt.
  5. Add the vanilla bean sugar and mix until well combined.
  6. Add butter and mix on medium-low speed for three minutes.  Because there is so little butter, you'll end up with a very fine crumb texture.
  7. In a small mixing bowl, whisk together eggs, sour cream, oil, and vanilla extract until smooth.
  8. Add the egg mixture to the flour mixture and beat on medium speed until just combined.
  9. Slowly add milk and mix on low speed until just combined.  The batter will be liquid.  (Don't worry, you didn't do anything wrong.  It's supposed to be that way.)
  10. Fill cupcake liners just over 1/2 full.
  11. Bake for 14 minutes and then test to see if they are done. They are done when a toothpick comes out without wet batter stuck to it.  The cupcakes should appear white with specks of vanilla bean. They should not turn a golden brown.  If they are not done, test again in two minutes.  If they are still not done, test again in another two minutes.
  12. When the cupcakes are done, remove them immediately from the tins and leave them on a cooling rack (or just on your counter if you don't own a cooling rack) to cool.


Read more: http://www.cupcakeproject.com/2011/09/ultimate-vanilla-cupcake-test-baked-by.html#ixzz1j7QDFkXr