This was a baby shower/gender reveal cake done in the nursery colors: khaki and gray. The cake was italian creme with swiss buttercream frosting and marshmallow fondant accents.
Saturday, October 12, 2013
Friday, October 11, 2013
Military Retirement
I had the privilege of making our neighbor's retirement cake. John is retiring in January after almost 26 years of service. (He just had his ceremony a little early.) The cake is buttercream with a royal icing logo.
Saturday, October 5, 2013
Pirates and Princesses
We have a party place here in our town called Fefe and Frogs. They do themed parties mostly for little girls, but if you want a few of your little boy friends to come, you get to have a "Pirates and Princesses" party. So that's what I did for Madelyn. This cake is covered in buttercream with marshmallow fondant accents. The crown topper is made of royal icing.
treasure map
"X" marks the spot
Tuesday, October 1, 2013
Warrior Salad
Ok, so this is NOT a cake or anything sweet for that matter (unless you count the "craisins"). But it is delicious and I felt like sharing.
Drew and I are on a health kick right now. We're eating right and *gasp* exercising! So I bought some quinoa, which I love, but was looking for a way to jazz it up. I found it in Daphne Oz's "warrior salad." You can find the recipe HERE.
Sunday, September 29, 2013
Go Spartans!
I airbrushed this 1/2 sheet cake for my nephew. He plays football (obviously) and was very excited to be able to "eat" his own face!
Here's the birthday boy with his cake.
Saturday, September 28, 2013
Princess Palooza!
I made a princess cake for a little sweetie. Her favorites are: Sophia, Cinderella, Aurora, and Ariel (in that order), so those are the princesses that made it on the cake. The cake is covered in buttercream and the princesses are made of royal icing.
Here's a close up of the princesses. I'm no artist by any means and drawing especially has never been my strong suit. Some of these gals turned out better than others. Being made of royal icing, they are VERY fragile. I broke Ariel in 2 places, but luckily I was able to "glue" her back together with more royal icing.
Aurora probably turned out the best.
Cinderella, however did not have the same fate. She is my absolute favorite princess so I was a little disappointed when she ended up looking a little distorted. Other than her crazy eyes, she looks great.
It was a fun cake to make and I hope Princess Anna had a great birthday!
Saturday, September 7, 2013
A Mermaid Under The Sea!
What fun today's cake was! From time to time I donate gift certificates to our consignment sale and MOMs group. A friend of mine won the gift certificate and she used it for a mermaid/under the sea cake for her daughter's 2nd birthday. Here's the result:

seahorse and clownfish on one side
friendly purple octopus on the other!
fondant mermaid cake topper
I've been wanting to try fondant cake toppers for a while, but I was WAY intimidated. Leave it to me to take on something not so simple for my first go. (Yep, this was my FIRST FONDANT FIGURE EVER!) Though she's pretty rough around the edges and it took me 3 tries to get her face molded I think it turned out quite well! *I used My Cupcake Addiction's tutorial for help.* Here's how the process went:
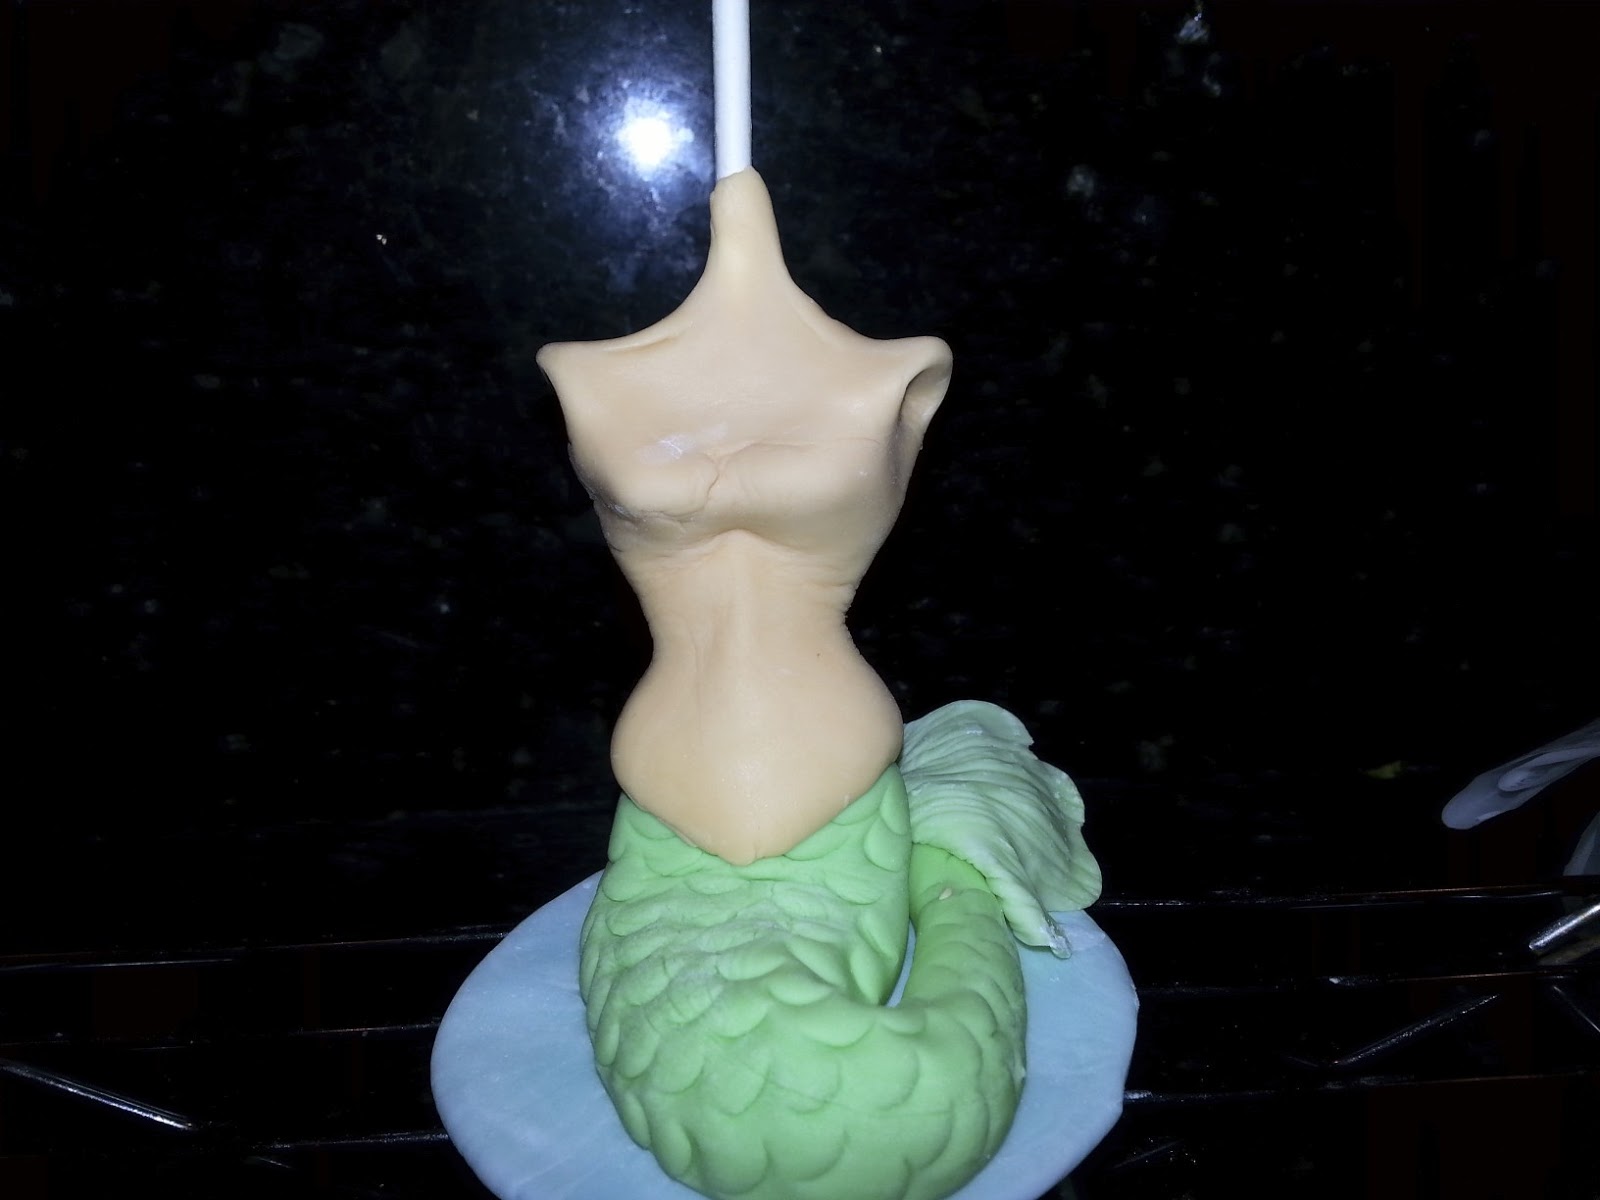
First, I put a lollipop stick in some gumpaste and let it dry. Then I made the tail and attached it to the stick.
Next, I shaped the torso.
Then after 3 tries and lots of drying I attached her head.
Then came arms.
Then shells and hair.
Finally, I painted her face and attached a few more pieces of hair.
She was a labor of love and like I said, she's not perfect, but I'm proud of how she turned out. A few things I learned:
* My fondant was just a touch to thin. How do I know this? Because her torso started sagging causing her to look like an old wrinkled lady. At one point I had to remove her hair and let her dry out some more.
* I need some GOOD detail brushes. When it came time to add the details to the face, I realized my food grade brushes were all too wide. The detail you see on her face was done completely with TOOTHPICKS! That's why her mouth isn't as pretty as I had hoped.
Since my fondant was a little soft, I actually used a little added support when I put her on the cake. I stuck her down on the skewer that goes through the whole cake. Hey, I didn't say it was pretty...but she was up there!
And the most important thing I learned? I CAN DO FONDANT FIGURES!!!
Subscribe to:
Posts (Atom)